Login to a graphical desktop environment with a remote desktop client
Windows Client
Remote Desktop Connection is pre-installed with all Windows versions except home editions.
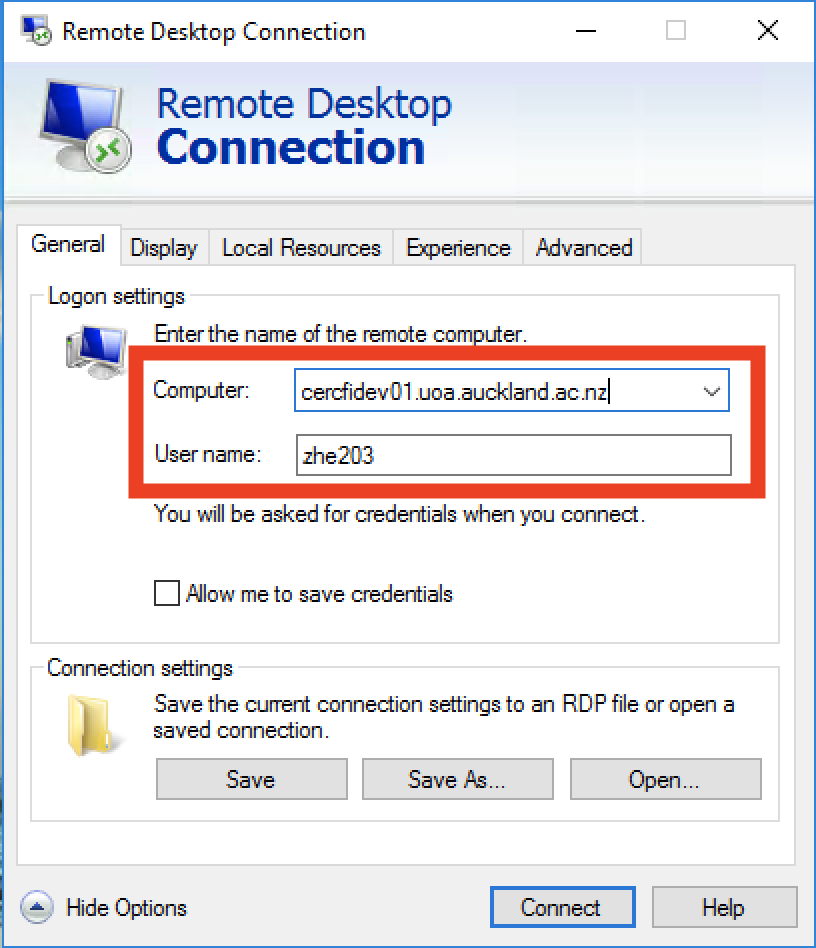
Create a new remote desktop connection. Set the Computer as the VM's host name and User name as your University username.
(Note, that the exact look may differ from what you see below if you are using a different version of the remote desktop connection than we used to create this manual)

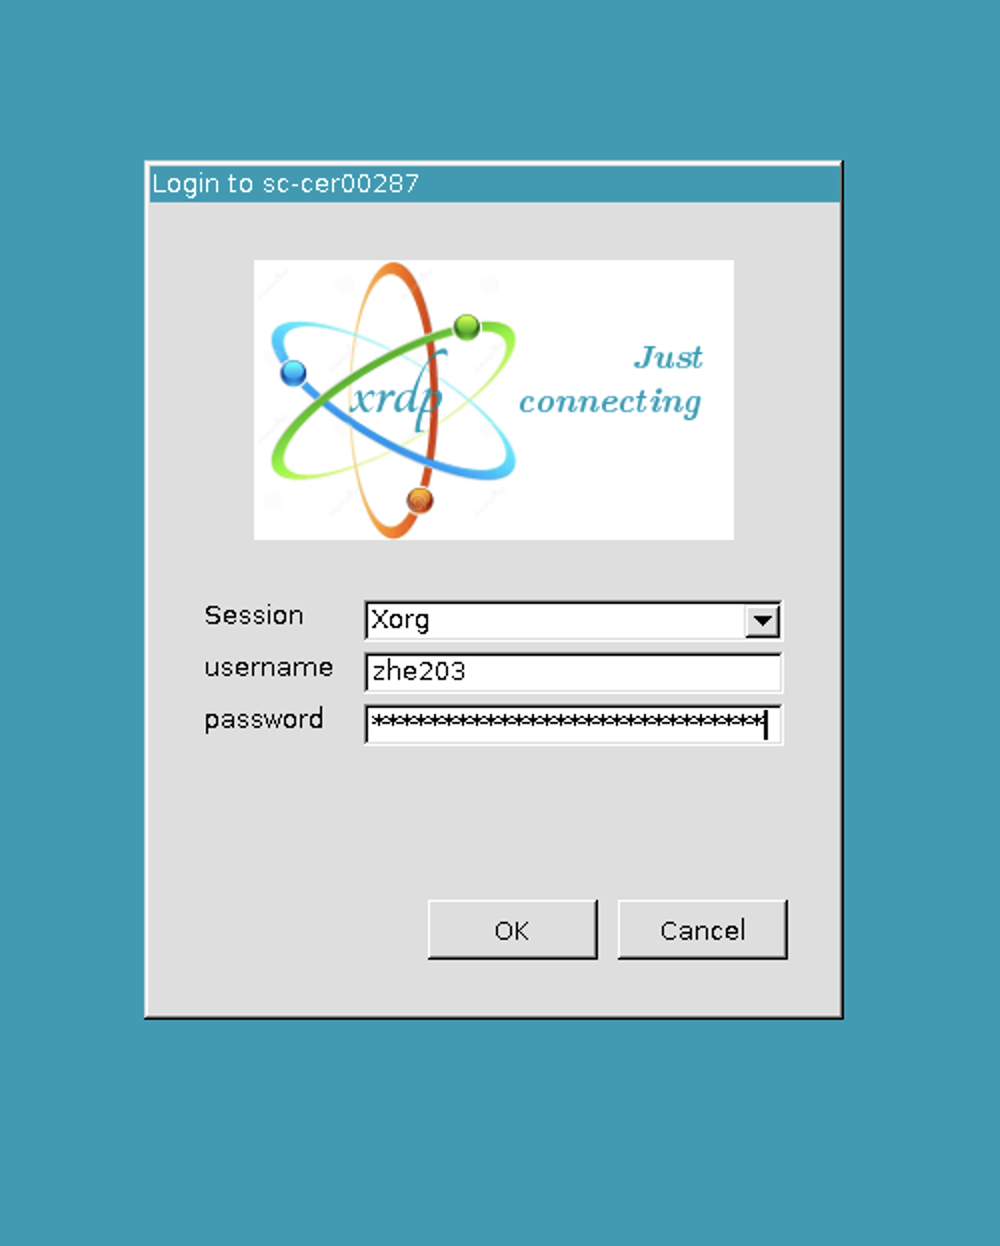
Then, click Connect and enter your university password. If you have sudo privileges on the VM you need to use 2-factor authentication for the Password field. Otherwise just type your University password.

Click 'OK' to connect to the virtual machine.
Mac Client
Download the Microsoft Remote Desktop client from the Mac App Store.
Create a new remote desktop connection. Set the PC name as the VM's host name and User name as your University username.
(Note, that the exact look may differ from what you see below if you are using a different version of the remote desktop connection than we used to create this manual)

Then, you can login with your university password. If you have sudo privileges on the VM you need to use 2-factor authentication for the Password field. Otherwise, just type your University password.
Accessing Local Files and Folders on Remote Desktop Session
To access local files from virtual machines, you need to configure the remote desktop connection settings before connecting to the VM.
On Windows, choose your local resources in the settings of your remote desktop connection window. Notice below the More button at the bottom which takes you to the local devices and resources section which allows resources to be chosen.

On Mac, Add local resources follow the screen shot below:

On a Ubuntu virtual machine, you will see these redirected drives on your Desktop by clicking on the icon thinclient_drives:
