How to access Windows VMs in Auckland cluster
Notice
Due to Microsoft licensing requirements, access to Windows VM on Nectar has a few limitations, including: - Only Windows Servers are available. No desktop Windows is offered. - Only two users can login at the same time. - We can not install and run Microsoft Office on Windows VMs. - You can not share the Windows VM with non-UoA collaborators.
If you prefer video tutorials, you can refer to Nectar On-board Tutorial Videos
Launch a Windows instance
Login to Nectar Dashboard via Tuakiri. Browse to Project > Compute > Images as shown in the picture below, and enter UoA-Server in the search box. You will find the prebuilt images for Windows instances.
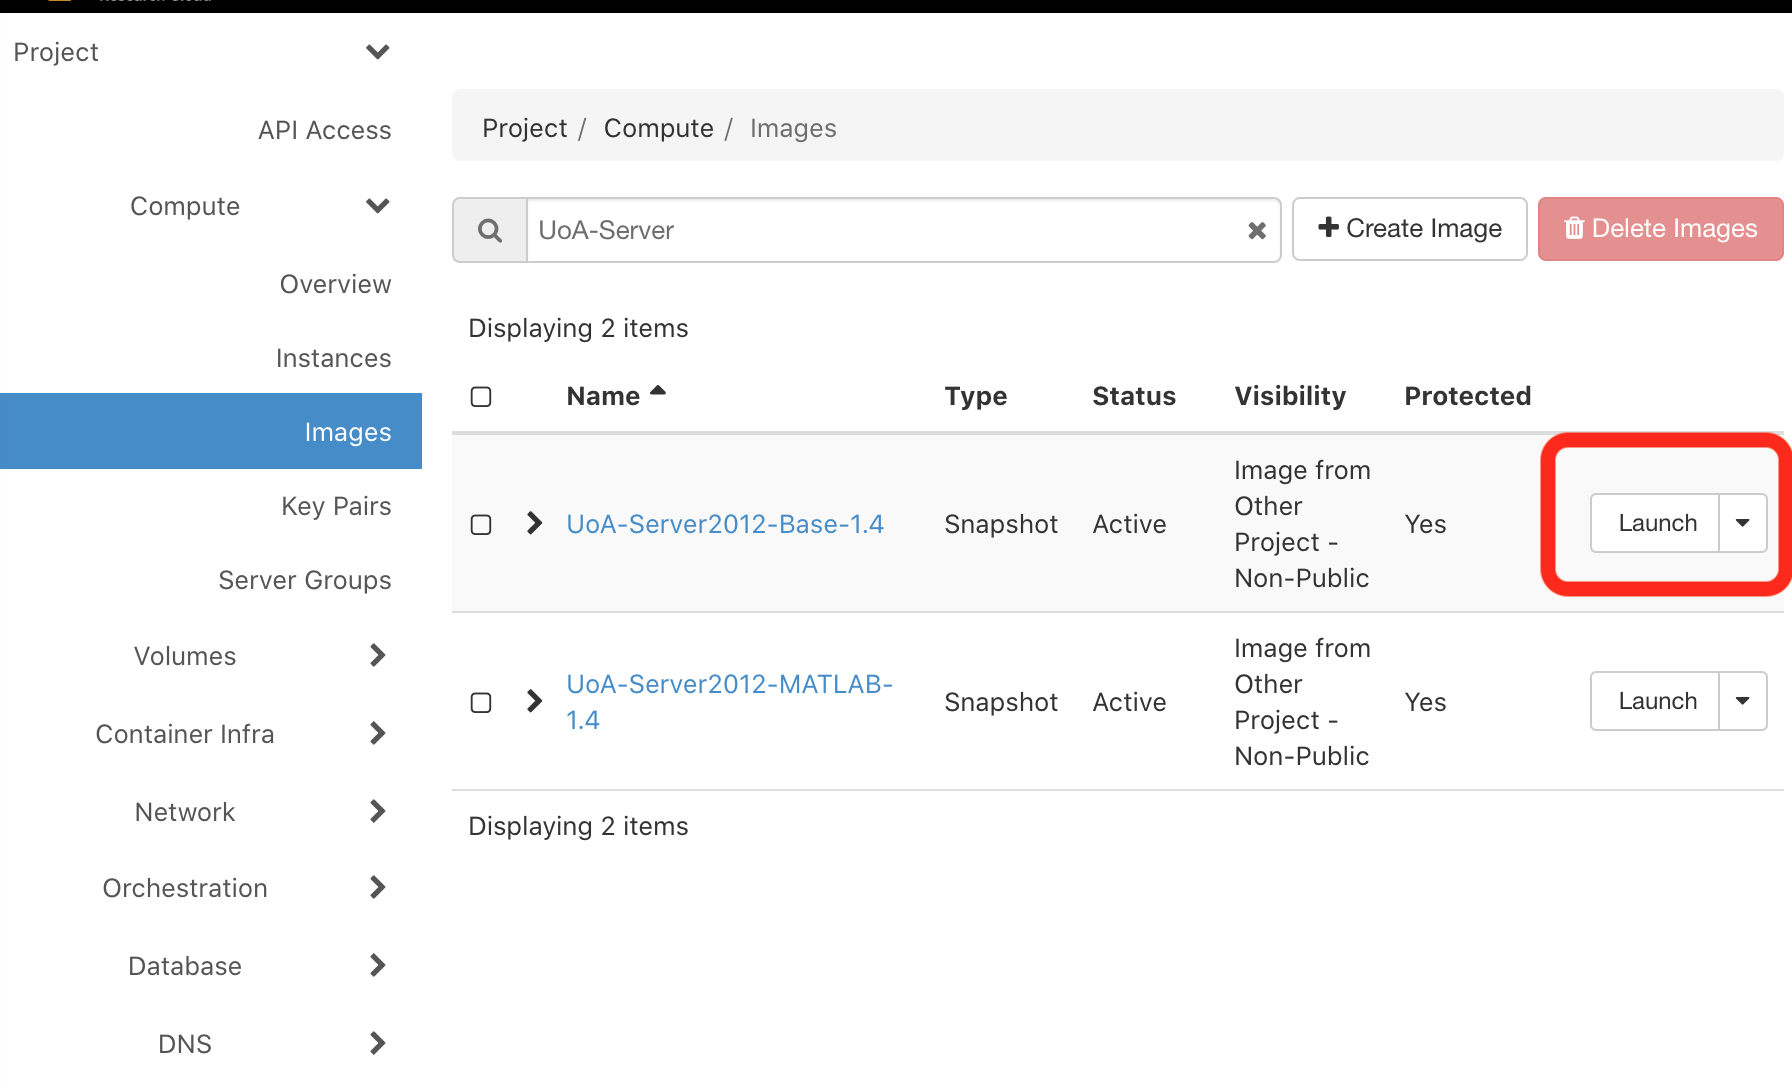
If there are multiple images, please always choose the latest one, and click the "Launch" button to start the new instance wizard.
In the Details tab, please select auckland from the Availability Zone dropdown box.

In the Security Groups tab, please make sure you've enabled Remote Desktop Protocol (RDP, port 3389) ingress.
Click the "Launch" button, and go to Project > Compute > Instances panel, wait until the status of your new instance is Active. It might take 2-10 minutes, depending on the size of your VM.
For more information about other VM launching options, security groups, and keys, please refer to the following Nectar tutorials:
Initialise your Windows administrator account
Before you can use the Windows VM, you need to set a password for the administrator.
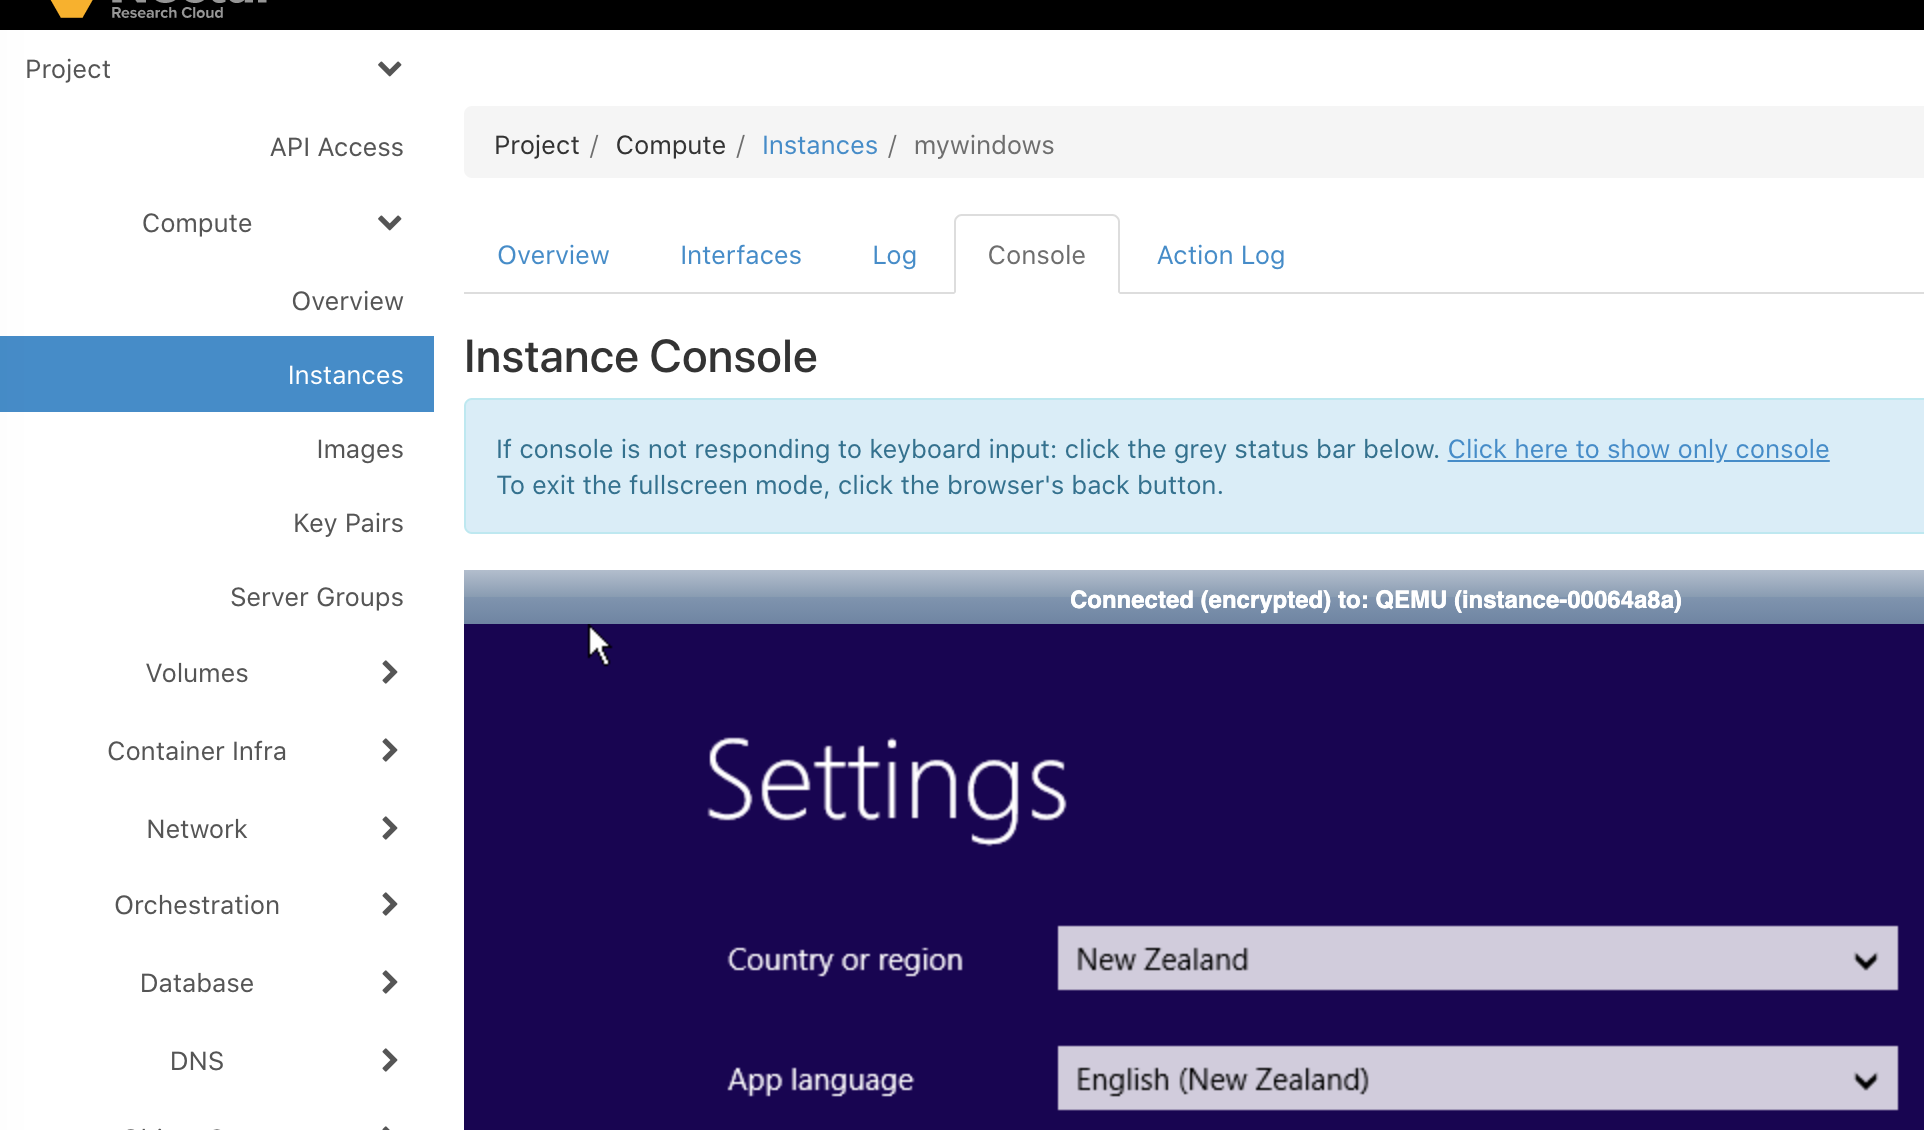
Browse to Project > Compute > Instances panel, and click on your instance. In the instance detail page, click Console tab. You'll see a welcome screen like this:
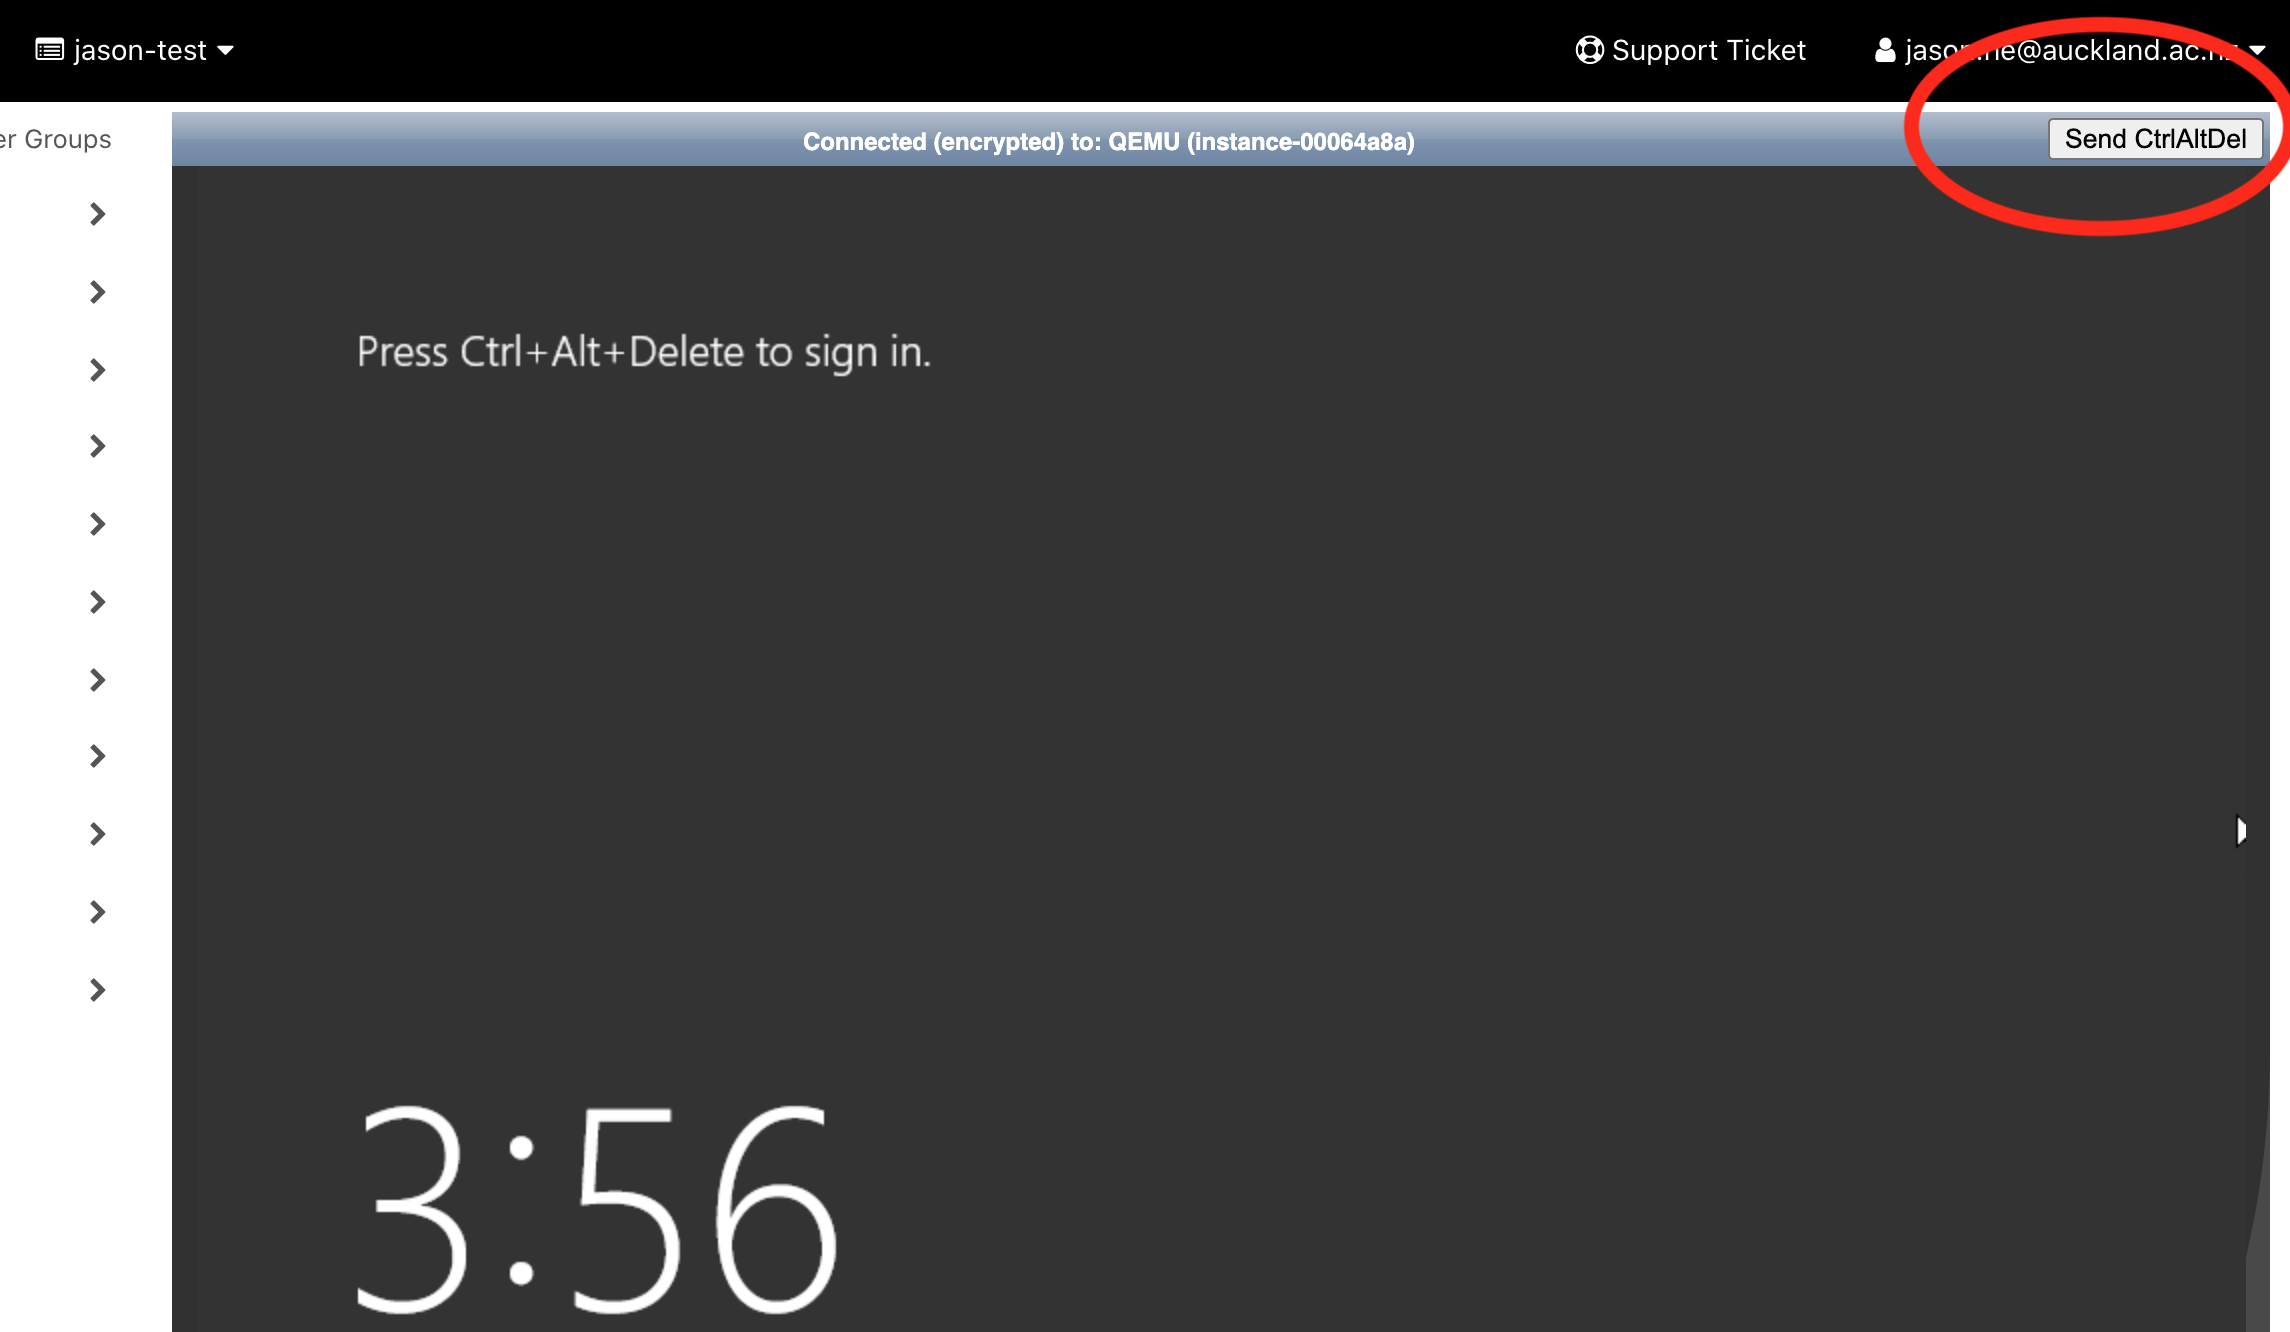
Click "Next" and it will ask you to enter the password for administrator. When administrator's password is set, you can try to login as administrator by clicking the Send CtrlAltDel button on the top right corner.
Remote login via Remote Desktop
Note: you must enable remote desktop protocol port in security groups to be able to remotely login. Also, if you're off-campus, you need to connect to the University VPN first.
For Windows desktop, Microsoft Remote Desktop is built-in. For macOS users, download the Microsoft Remote Desktop client from the Mac App Store.
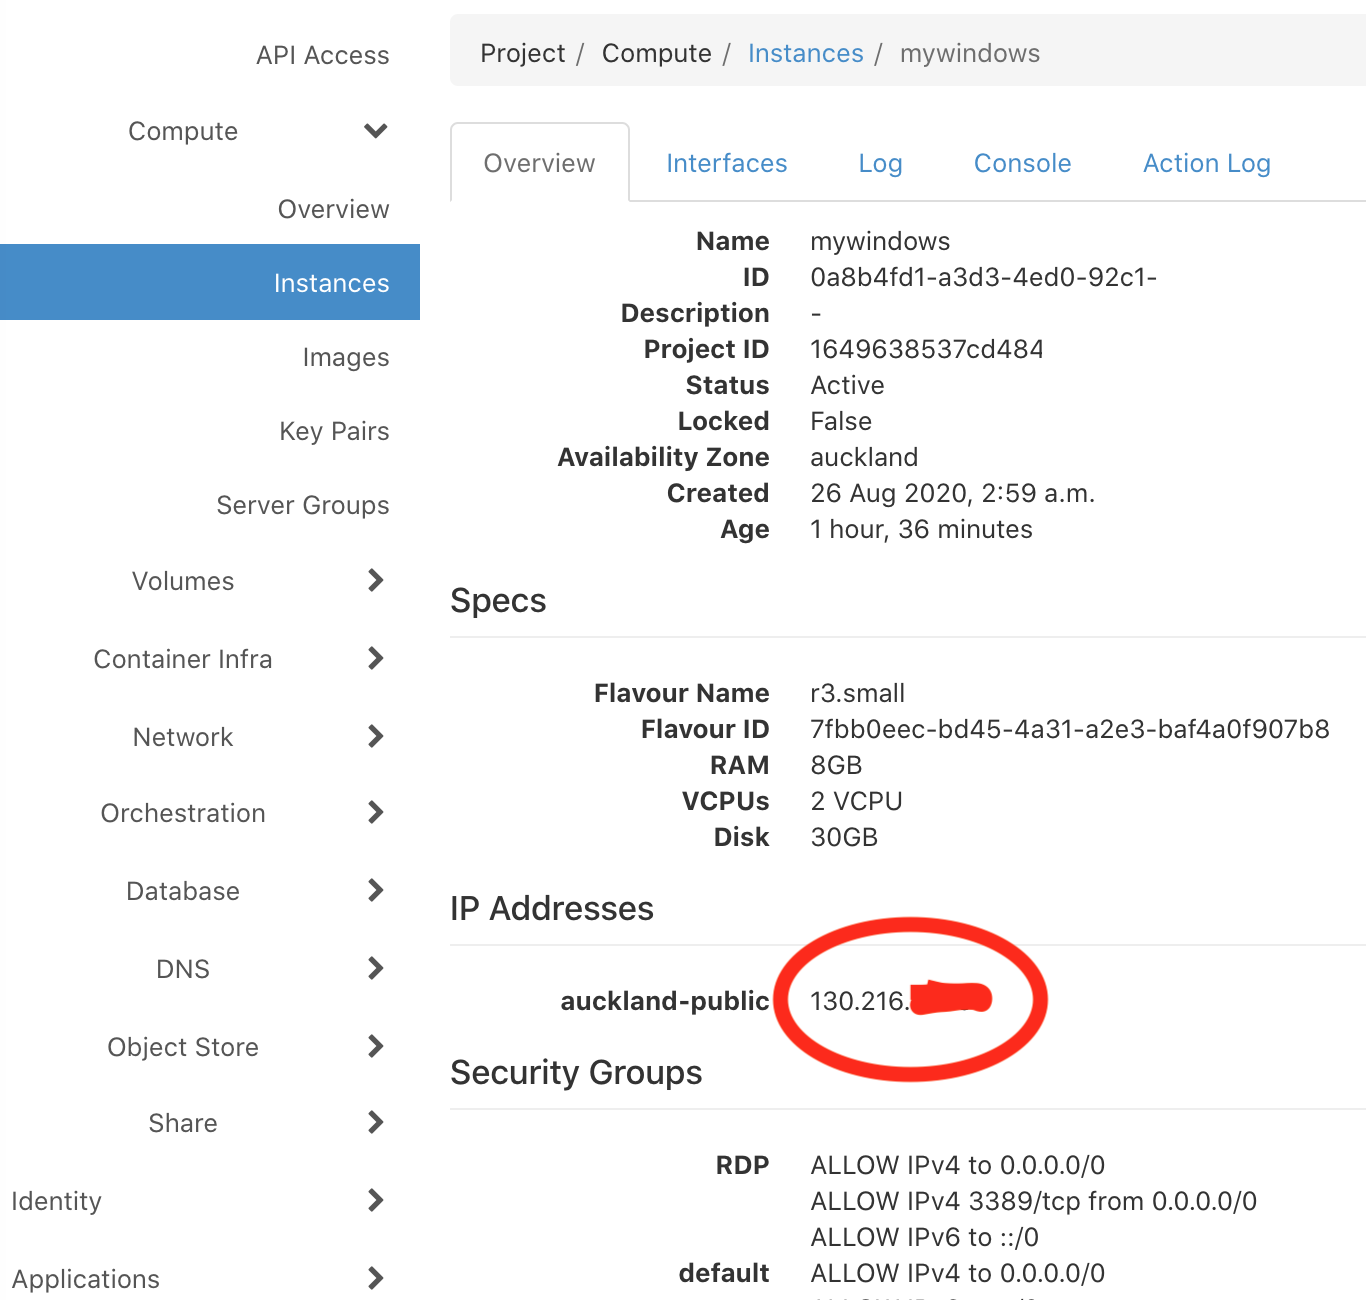
You need to find the IP address of your VM to connect to, and it can be found via the instance detail page, as follows:
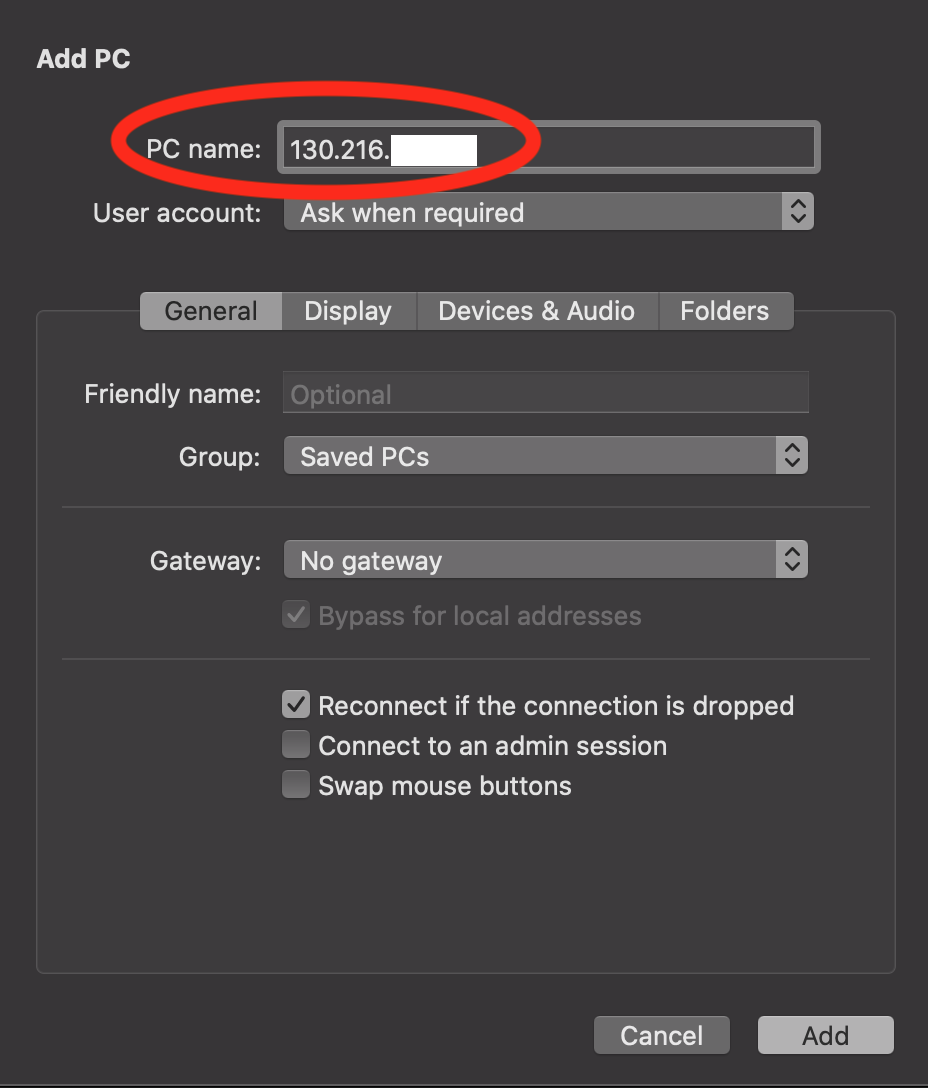
Open Microsoft Remote Desktop application, create a new connection, and in the dialogue box, enter your VM's IP address as "PC name".
Connect to your VM, and login with the administrator's credential, you should be able to see the Windows desktop.