How to launch a GPU instance in Auckland cluster
Note: GPU is NOT available for all Nectar projects. You have to reserve it first. Please refer to How to reserve a GPU in Auckland cluster before you can launch a GPU instance.
Launch a GPU instance
Login to Nectar Dashboard via Tuakiri. Please make sure you’ve selected the correct project that you used to reserve the GPU.
Browse to Project > Compute > Images as shown in the picture below, and enter CeR in the search box. You will find the prebuilt images for GPU instances. The image is built upon the latest Ubuntu LTS and has lots of useful tools pre-installed, such as the NVIDIA GPU drivers. If you have an approved GPU project and can not find an image, please contact us.
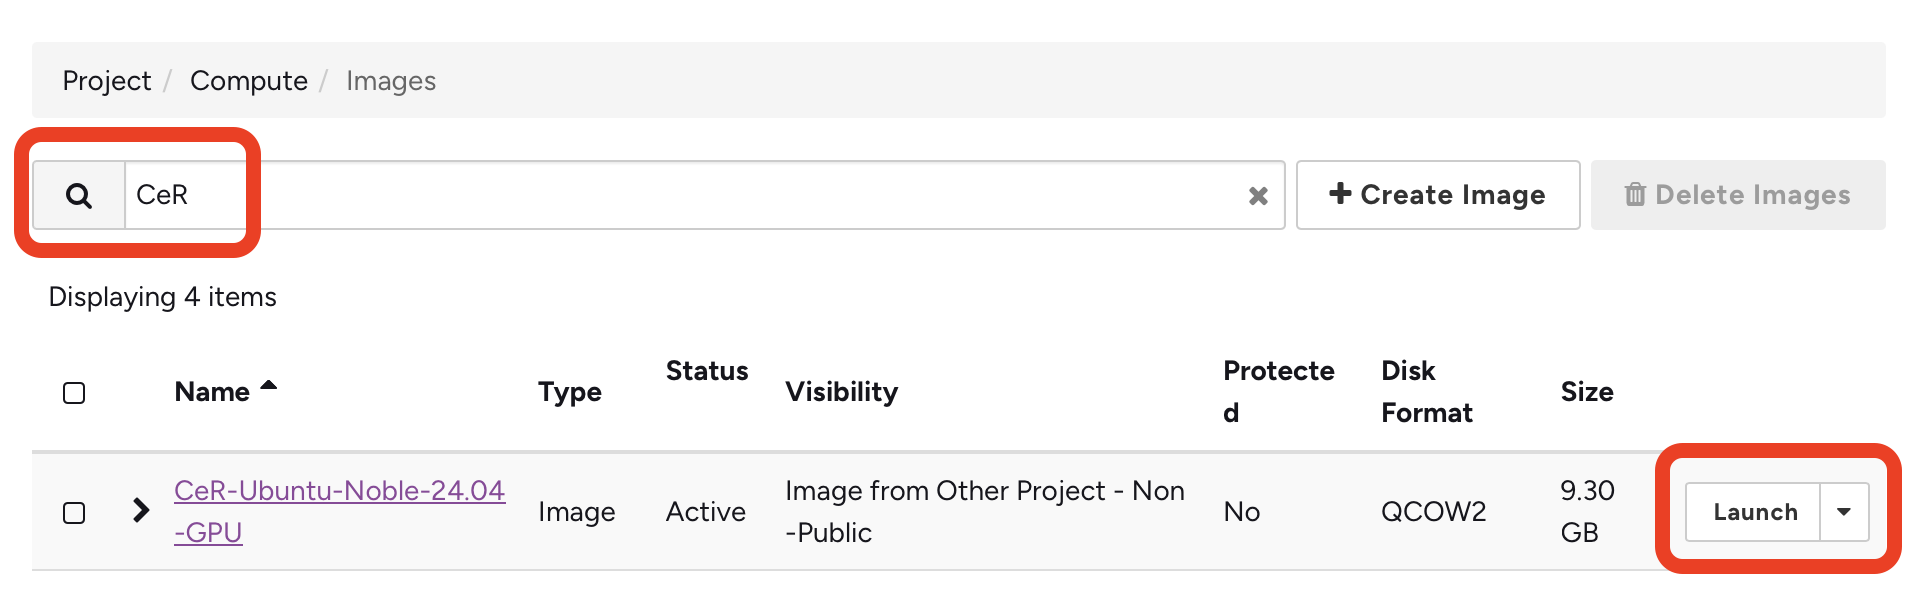
If there are multiple images, please always choose the latest one, and click the “Launch” button to start the new instance wizard. If you can not see the image, please contact us and we will help you to share the image with your project.
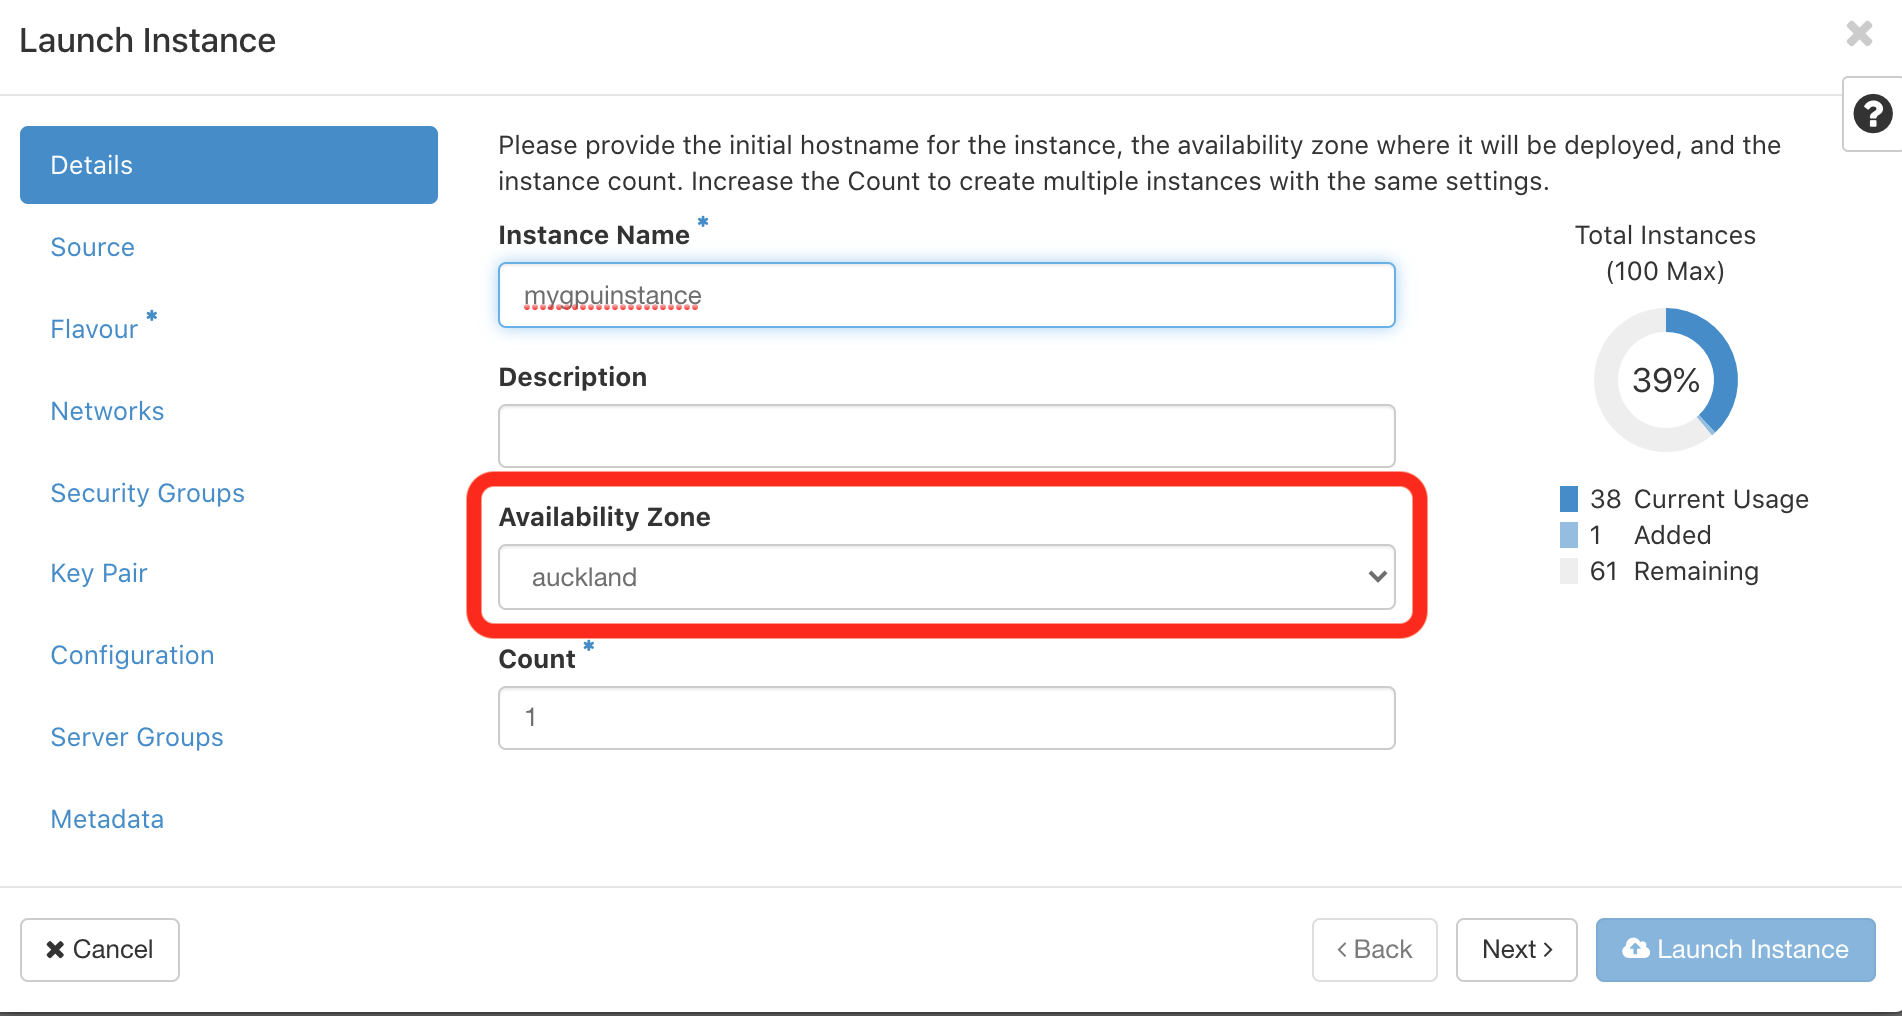
In the Details tab, please select auckland from the Availability Zone dropdown box.
In the Flavour tab, please enter reservation in the filter box, and select the corresponding GPU flavour that your project has been granted to.
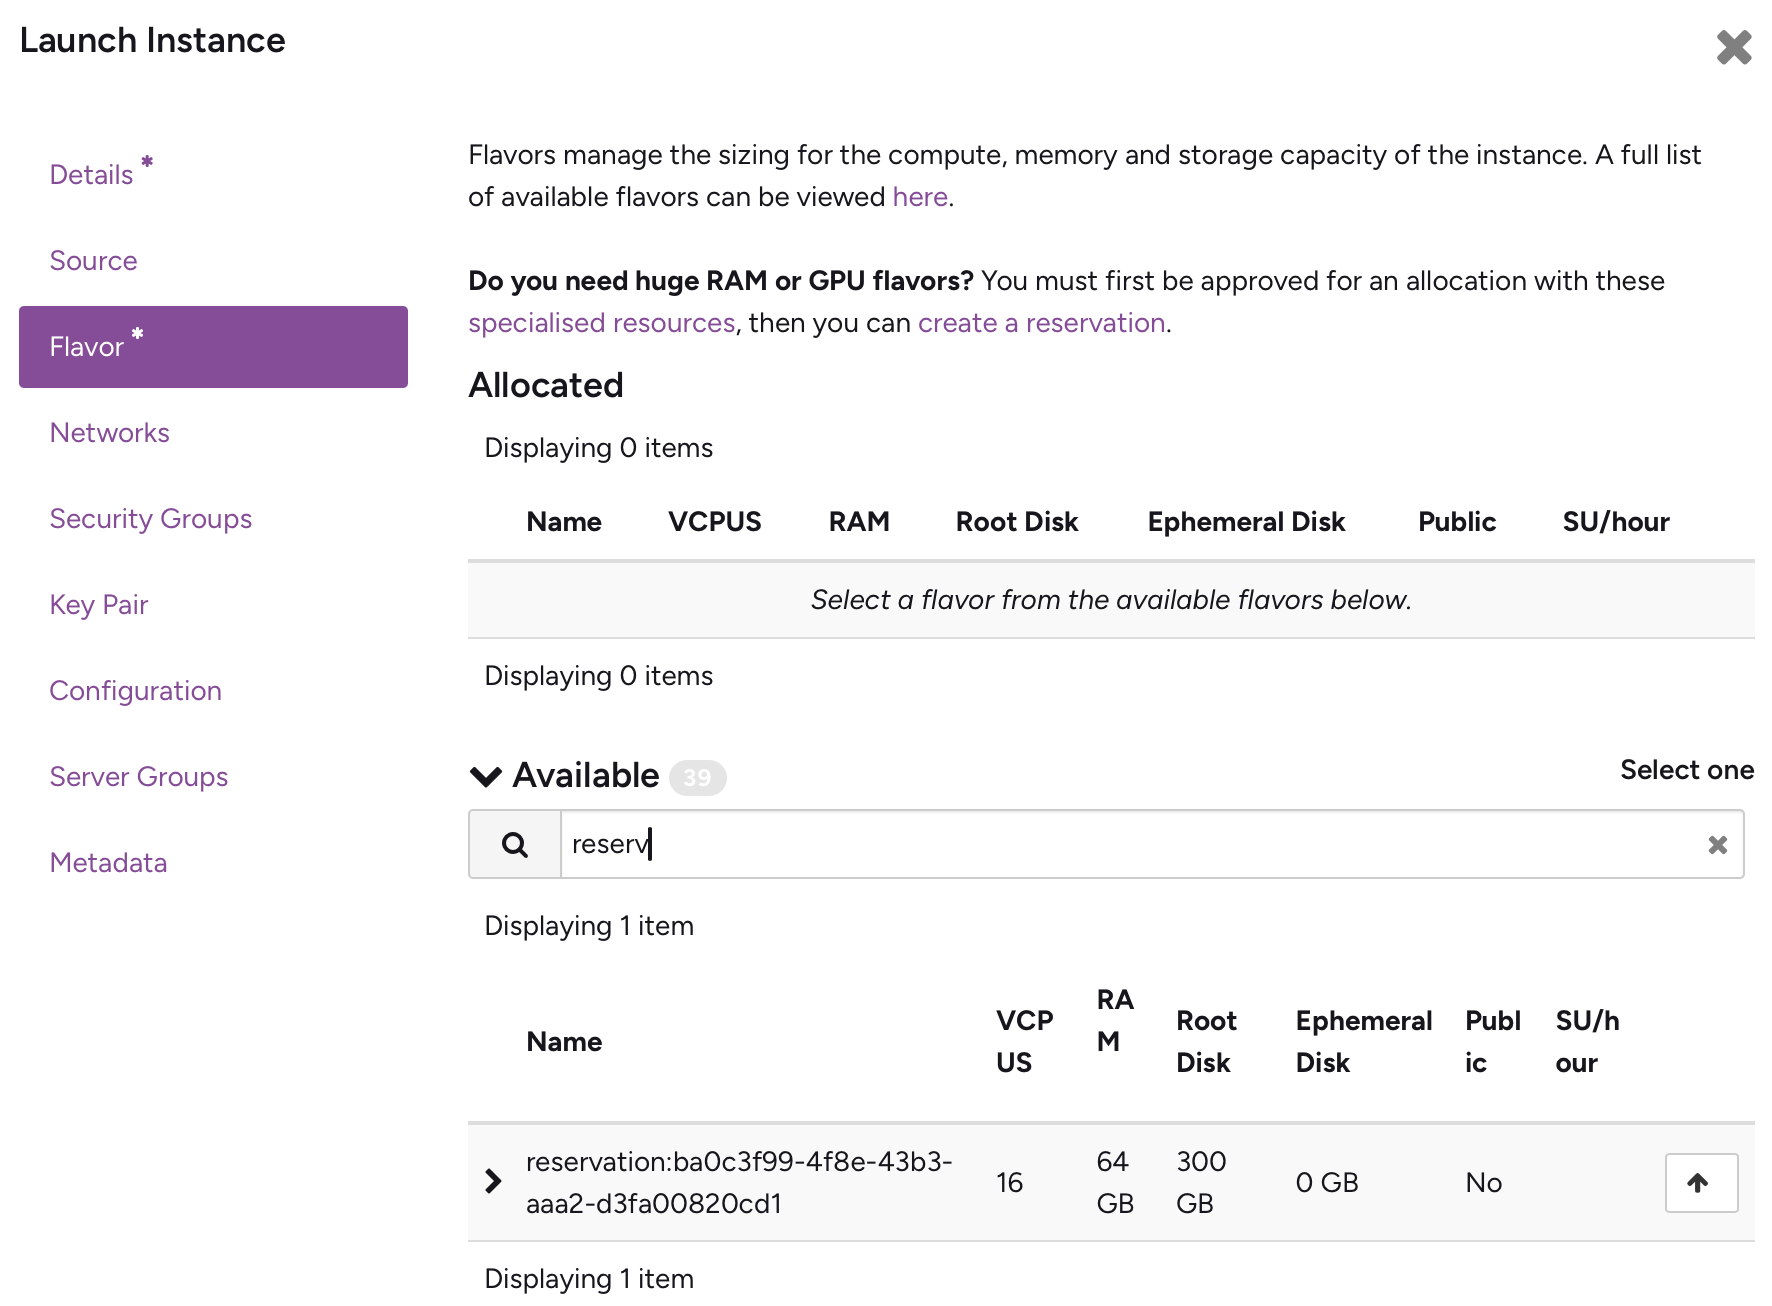
If you can’t find the flavour starting with reservation, it means your GPU reseration is not active or you are not using the correct project. Please refer to How to reserve a GPU in Auckland cluster for more information.
In the Security Groups tab, please make sure you’ve enabled SSH (port 22) ingress.
Click the “Launch” button, and go to Project > Compute > Instances panel, wait until the status of your new instance is Active. It might take 2-10 minutes, depending on the size of your VM.
For more information about other VM launching options, security groups, and keys, please refer to the following Nectar tutorials:
Access command line via SSH
You can follow this tutorial to connect your instance via SSH.
Access using SSH and web-based VNC
After you’ve logged in, please run lspci | grep NV to check if you can see your GPU in the VM. For example, a VM with K20 GPU should see something like this:
(base) ubuntu@mygpuinstance:~$ lspci | grep NV
00:06.0 3D controller: NVIDIA Corporation GK110GL [Tesla K20Xm] (rev a1)
That means your GPU is correctly attached to the VM, and you can start using it.
Windows Instances
Launching a Windows instance with GPU is technically possible, but we don’t have any Windows images with GPU drivers pre-installed. That means you will have to install the GPU drivers by yourself, which is not a trivial task. Replacing the CeR image with a Windows image in the above steps will create a Windows VM with GPU attached, but without the GPU drivers.