Managing a Data Volume on a Windows Nectar instance
Data Volume Management
Data storage volumes are available within Nectar allocations.
Attaching a storage volume to your Nectar instance provides you with an additional filesystem on your instance, allowing you to store your research data on an isolated partition, separate from the operating system. It is recommended as best practice that you keep your research data on storage volumes. Volumes are portable and secure, should the operating system fail in any way.
A volume can be detached from one Nectar instance and re-attached to another should you wish to move your work from one instance to another.
Volume allocation for nectar storage
Documented on Nectar at volume allocation for nectar storage
Managing Volumes on Nectar Instances
Linux Nectar Instance
Documented on Nectar in full at managing volumes on linux Nectar instances
Windows Nectar Instance
Create and format Windows partition on new empty volume
NOTE: this step is to be performed on new volumes. It will overwrite any content on an existing volume.
a. On the Nectar dashboard, create and attach the volume to your instance : Follow the documentation at create and attach volume, section “Attach a volume”.
This step makes the volume visible to your instance.
b. on your Nectar instance Configure the newly-created volume:
following Microsoft documentation.
This formats a disk partition on your volume.
Bring a formatted disk online
Note: This applies both
- when you are configuring a new volume, and
- when you are attaching a pre-existing volume to a new instance.
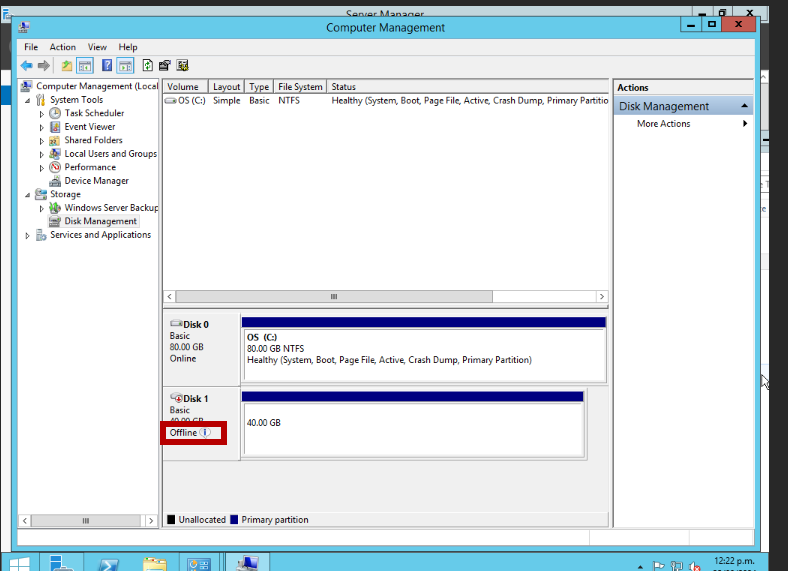
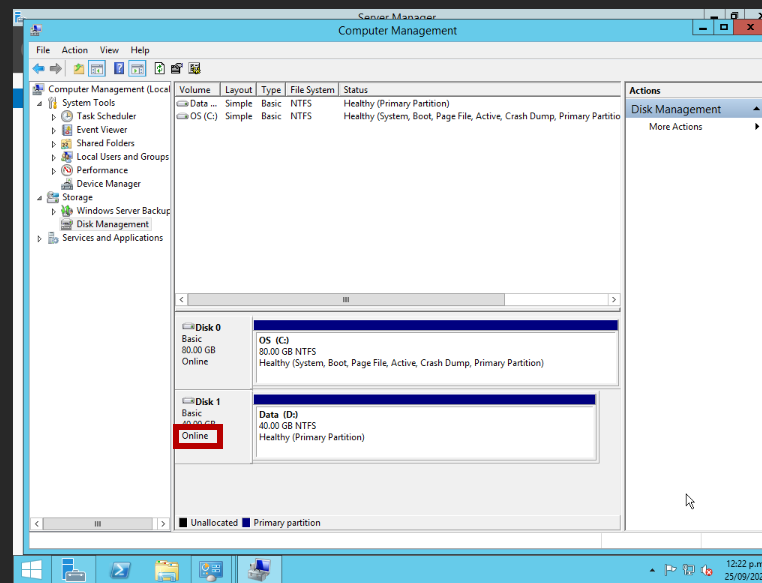
In both cases, if a formatted volume is attached to your instance, the instance should be able to see your volume as a disk, but it will probably be offline.

Select the “offline” text and a dropdown should appear which allows you to select “Online”. Select this and your volume should now be fully available.

Detaching a volume from your instance
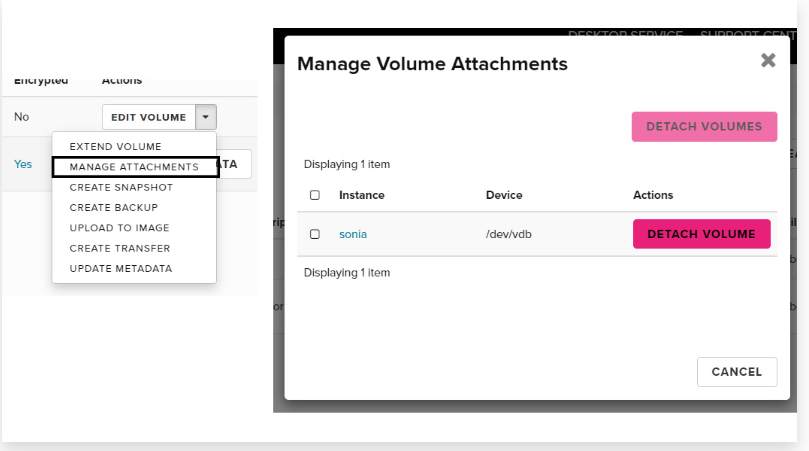
From the Nectar dashboard, detach a volume from an instance either from the instance actions on the Instances page, (select “Detach volume”) or from the “Detach volume” action on the Volume actions of the Volumes page.
