Login to a graphical desktop environment
desktop environment on remote vm
Prepare to install new packages:
sudo apt update
XFCE (recommended)
sudo apt install xfce4 xfce4-goodies
LXDE (very lightweight)
sudo apt install lxde
MATE (for a more traditional desktop)
sudo apt install ubuntu-mate-desktop
https://mylinux.work/guides/remmina-remote-desktop-client/
x2go
On the machine you’ll connect from, install the x2go client:
Connecting from a Linux Client BASH 
sudo apt-add-repository ppa:x2go/stable
sudo apt update
sudo apt install x2goclient
connecting from a MacOS client:
brew install --cask xquartz
brew install --cask x2goclient
Note: Login via x2go only works on Linux VMs that are set up for this. Please check with CeR if it doesn’t work for you and you feel it should work.
Download and install X2GO client
Please follow this article.
Configure a connection to your VM
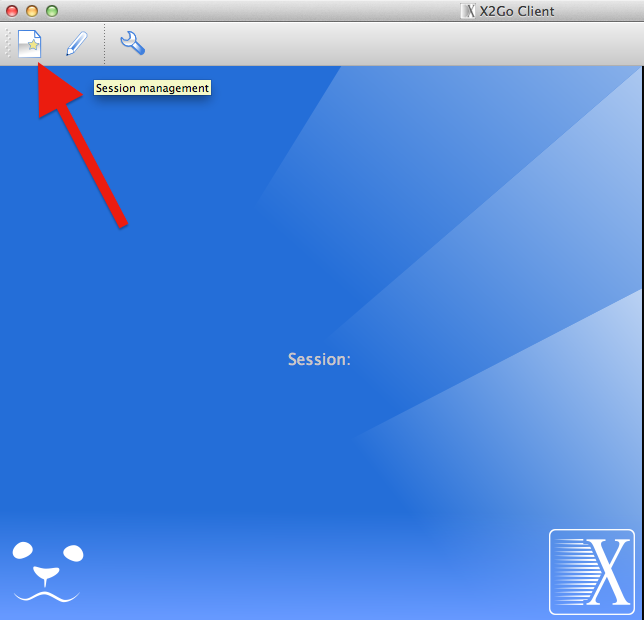
After starting the X2GO client, first create a new session:
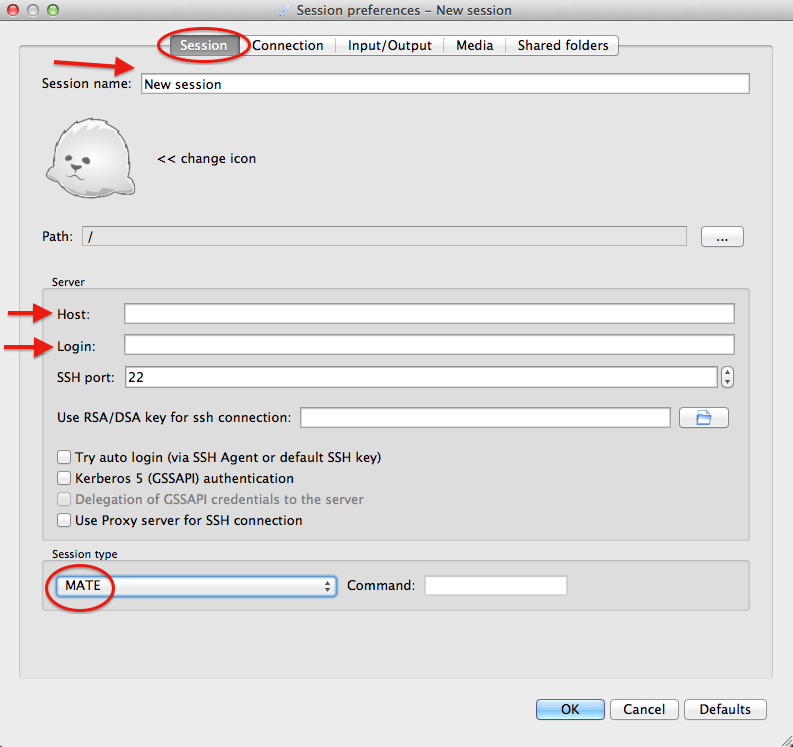
On the session tab, give your session a meaningful name and write the name of the VM into the “Host” field and your user name into the “Login” field. Make sure you choose MATE from the “Session type” selection menu.
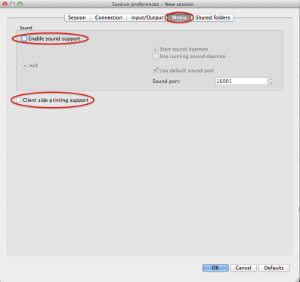
On the Media tab, please disable “Sound” and “Client side printing support:
Then click Ok. The new session will then show up on the right side of your X2GO client window.
Login
To log in, click the session you need. If you have sudo privileges on the VM you need to use 2-factor authentication for the Password field. Otherwise just type your University password.