Data Transfer Using Globus
Contents
Transfer data between UoA and other NZ locations
-
You can use globus to transfer data between your research drive and NeSI and other associated NZ public globus endpoints
- NeSI: General globus introduction
- NeSI: globus transfers
Transfer data between an institutional globus endpoint and your workstation
- Using GlobusConnectPersonal, you can create a personal endpoint on your workstation or Nectar vm, add your computer to globus
and transfer data between that endpoint and any NZ institutional endpoint in exactly the same way: Nectar vm data-transfers
University of Auckland Research Drive Access
If you have not previously transferred files to or from a University of Auckland Globus endpoint, you need to request access from Centre for eResearch. Please submit globus access to your research-drive
Access your research drive on the Data Transfer Node (DTN) either by using the link University of Auckland Research Data Collection or . searching the FileManager for the collection “University of Auckland Research Data Collection”.
Once you have logged in (UoA Single-Sign-On), navigate to your research drive from “/home/<your_upi>”, or “/~/” for short.
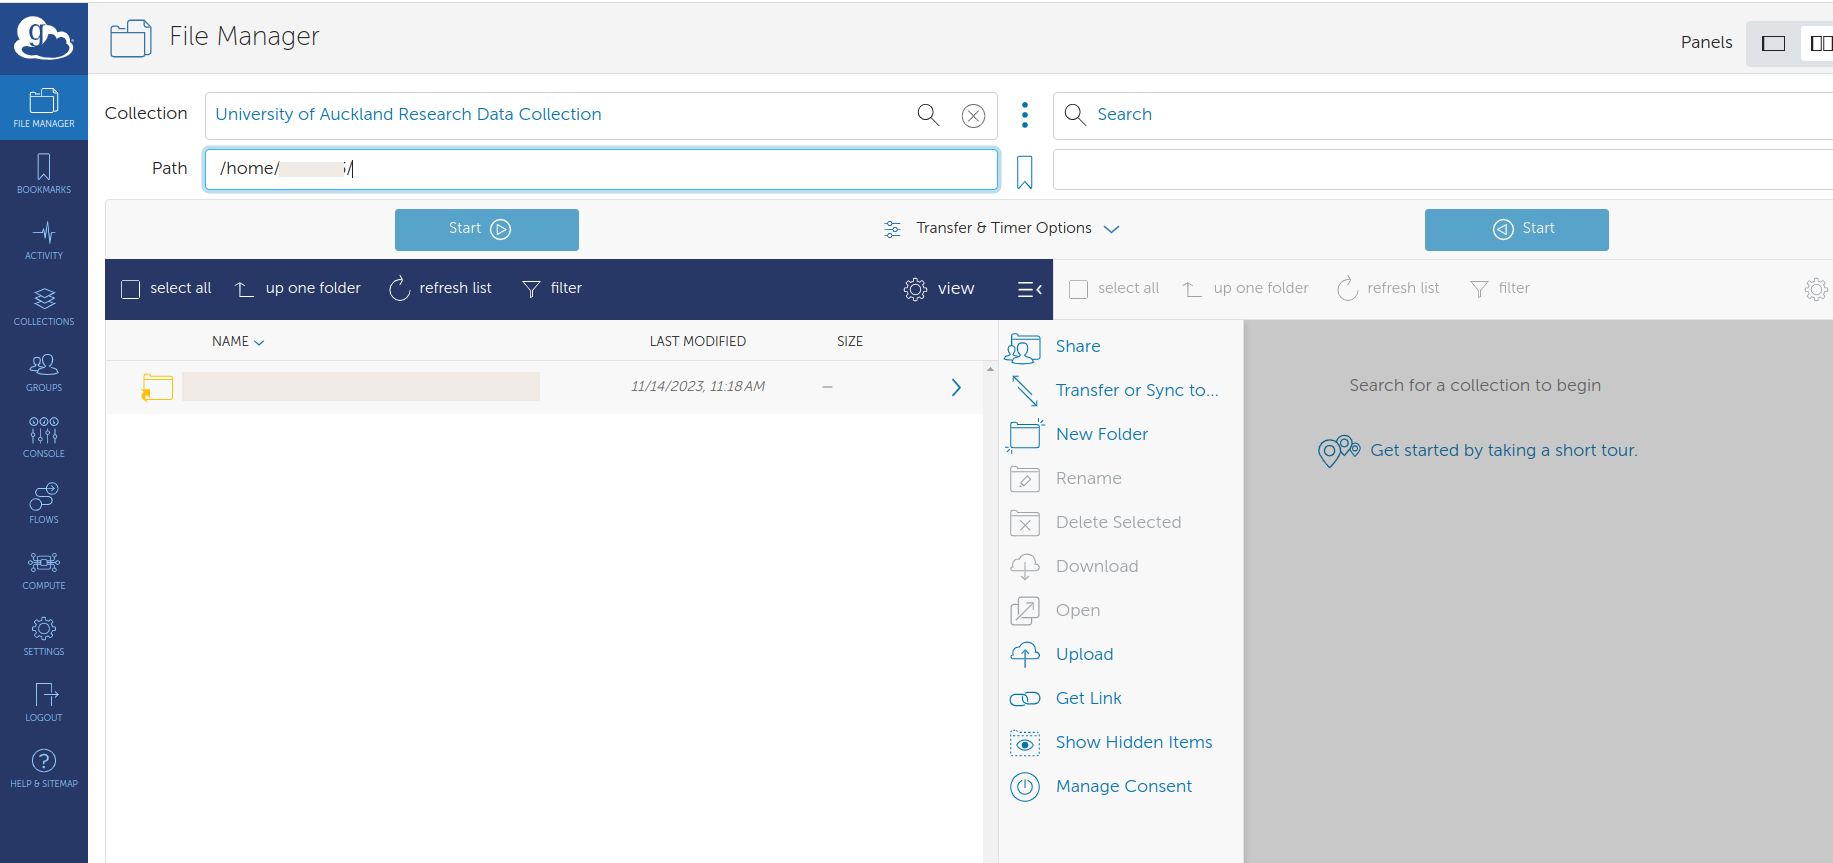
or to “/~/”:

File-transfer documentation
Very good documentation at File transfer
See also globus file-transfer documentation
Transfer Errors
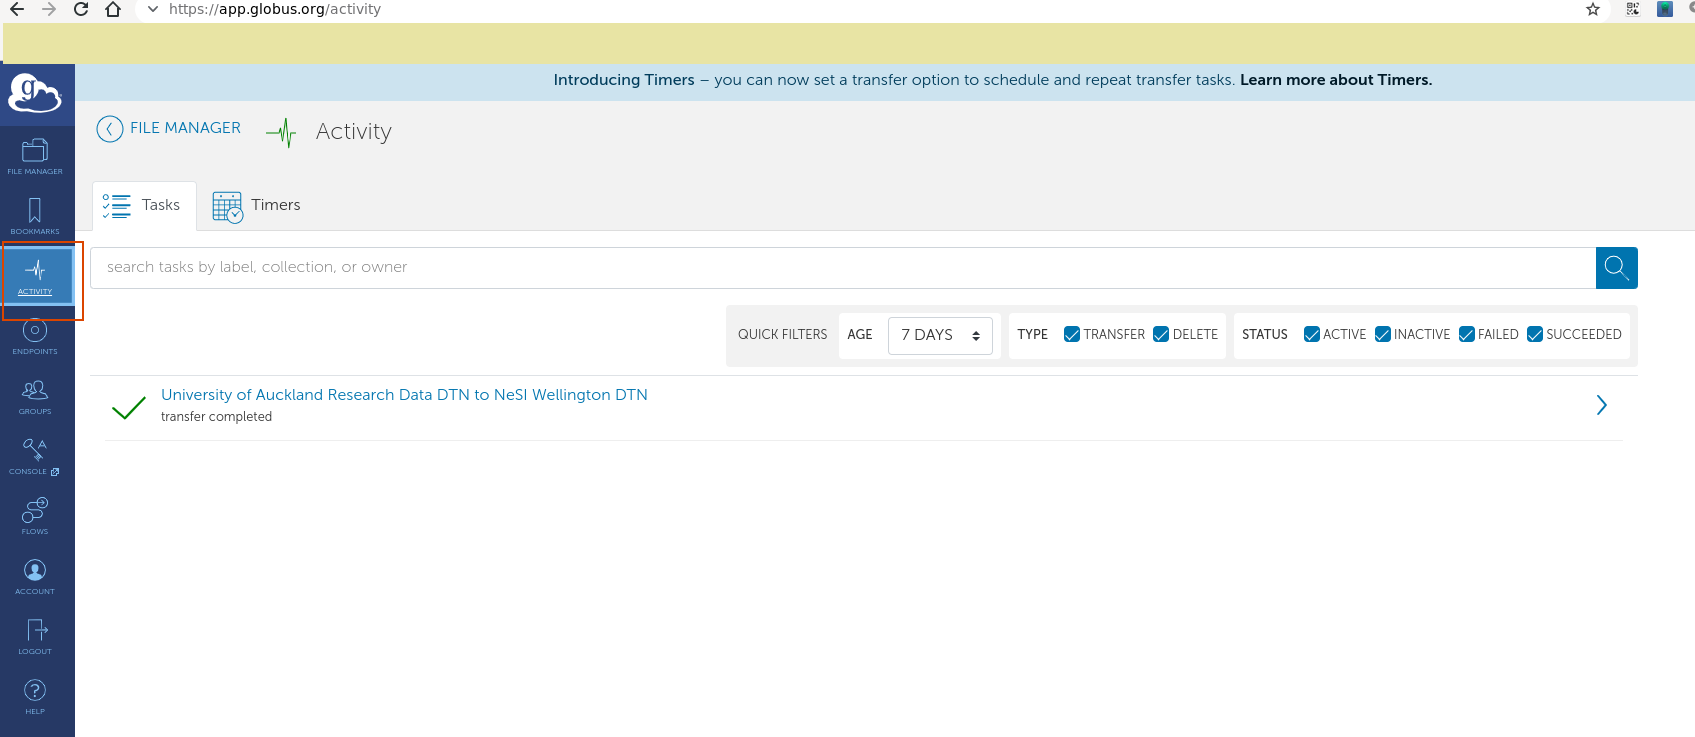
You can inspect the logs for your globus transfers from the console in globus:
-
Select the Activity tab on the LHS of the globus page and then select the job that you want to investigate.
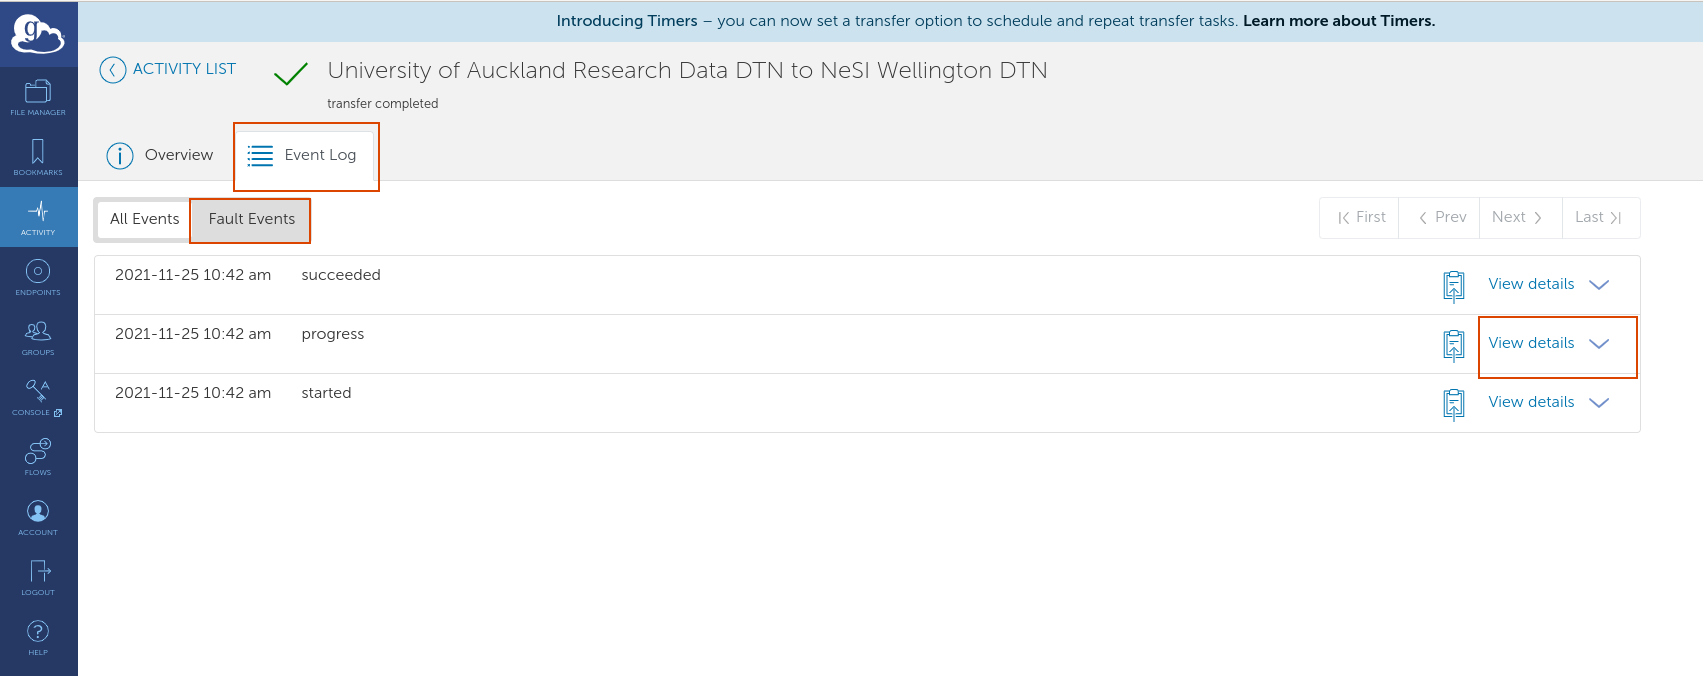
-
Select the Event Log tab (highlighted) and view the Fault Events for that job. You may be able to see the problem with your transfer here. If this raises issues you can’t control, please get in touch with Centre for eResearch.
Performance
Please read Data Transfer Best Practices
Data Transfer between two personal globus endpoints
Transferring files between two computers