How to launch and use Windows VMs in Auckland cluster
Notice
Due to Microsoft licensing requirements, access to Windows VM on Nectar has a few limitations, including:
- Only Windows Servers are available. No desktop Windows is offered.
- We can not install and run Microsoft Office on Windows VMs.
- You can not share the Windows VM with non-UoA collaborators.
Launch a Windows instance
Login to Nectar Dashboard via Tuakiri. Browse to Project > Compute > Images as shown in the picture below, and enter UoA - Windows in the search box. You will find the prebuilt images for Windows instances.
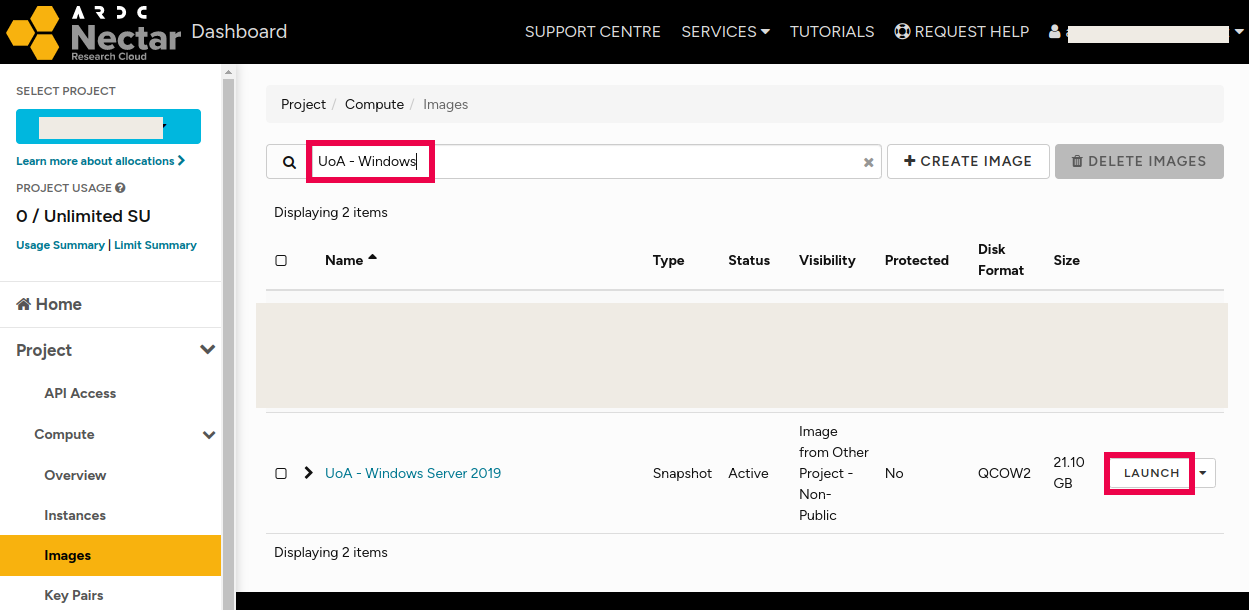
If there are multiple images, please always choose the latest one, and click the “Launch” button to start the new instance wizard.
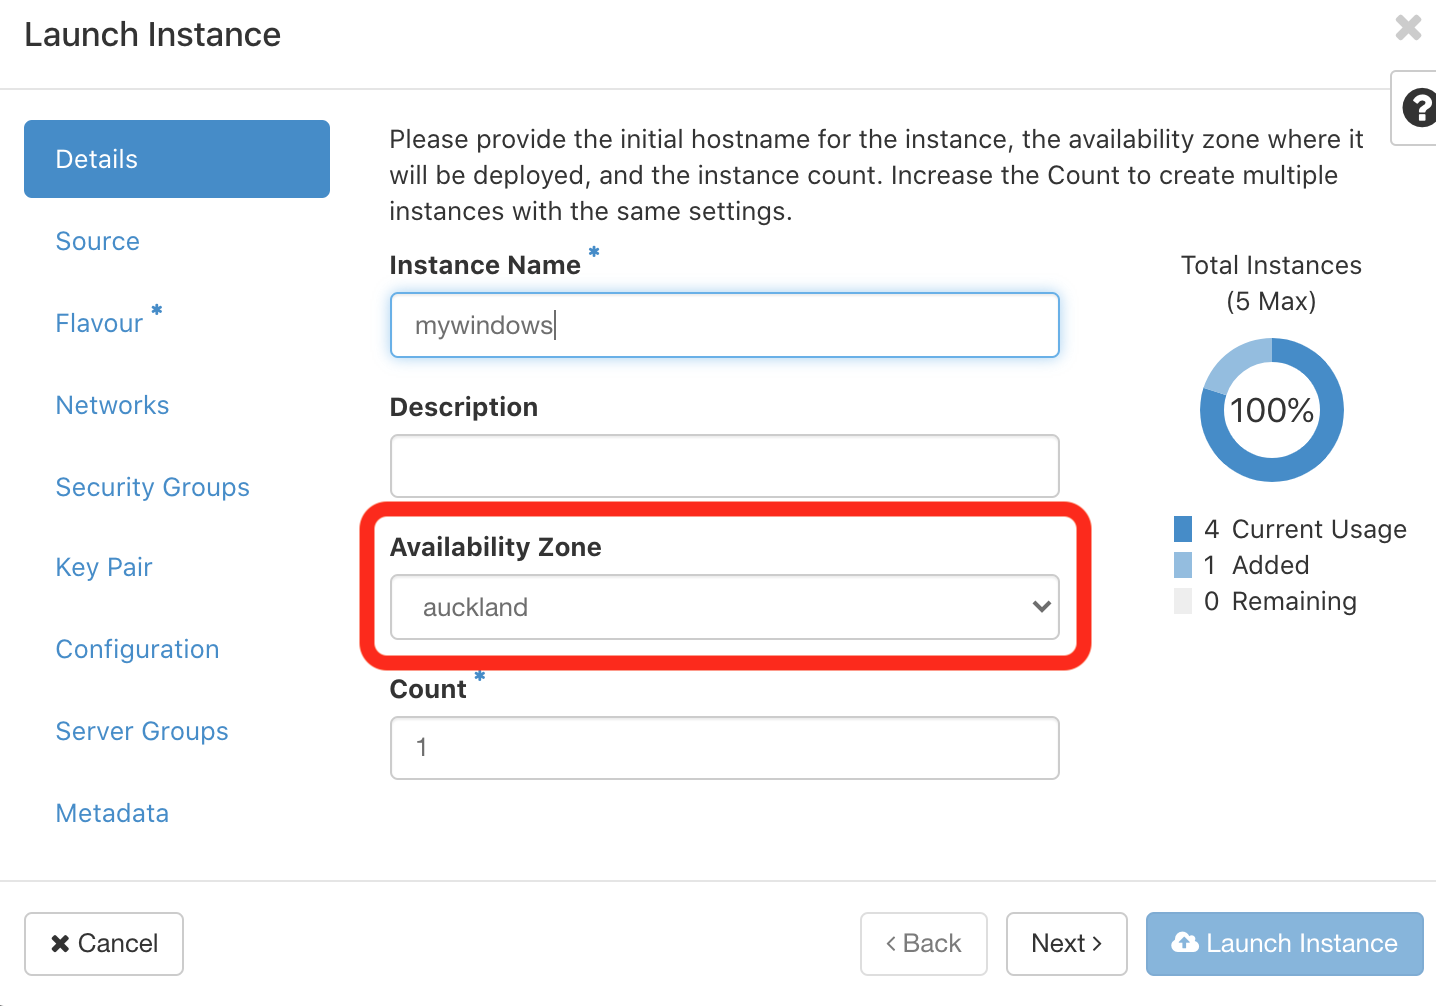
Select Auckland Availability Zone
In the Details tab, please select auckland from the Availability Zone dropdown box.
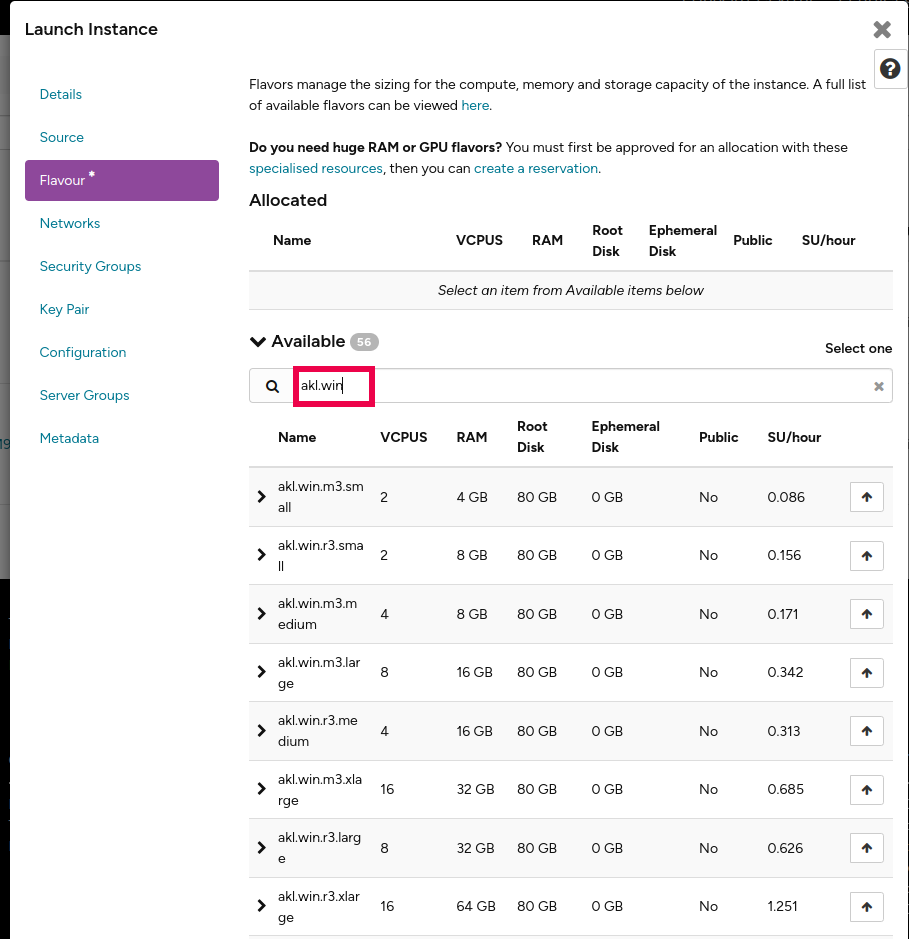
Select an Auckland Windows Flavour
Select a “flavour” by first searching for the string ‘akl.win, and then select’ according to your needs, within the limits of your allocation. Hit the up-arrow key to select it.
Create security group to permit RDP Access
In order to access your windows instance, you need to enable Remote Desktop Protocol (RDP, port 3389) ingress. Follow the instructions at Nectar RDP security groups
Launch the instance
Click the “Launch” button, and go to Project > Compute > Instances panel, wait until the status of your new instance is Active. It might take 2-10 minutes, depending on the size of your VM.
For more information about other VM launching options, security groups, and keys, please refer to the following Nectar tutorials:
Now you can begin to access your instance. First you need to configure your local administrator account on the instance:
Initialise the Windows nectar res-admin administrator account
Follow the instructions at Nectar RDP admin account configuration
Remote login via Remote Desktop
Follow the instructions at Nectar RDP login
Data Volume Management
Follow the instructions at Nectar Volume management