Create a Data Management Plan (DMP)
Create a new DMP
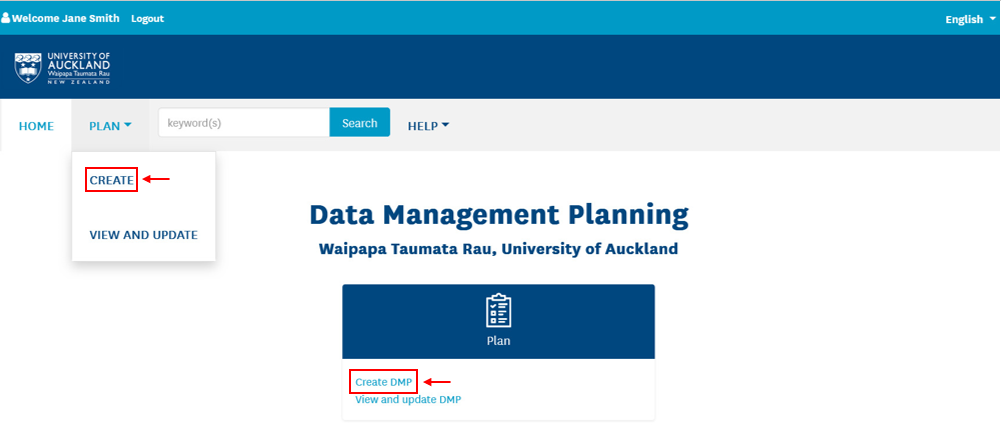
To create a new DMP:
- Click CREATE from the
PLANmenu, or - Click Create Research Management Plan (DMP) from the PLAN tile box on the dashboard.
Navigate the DMP
Move between DMP sections
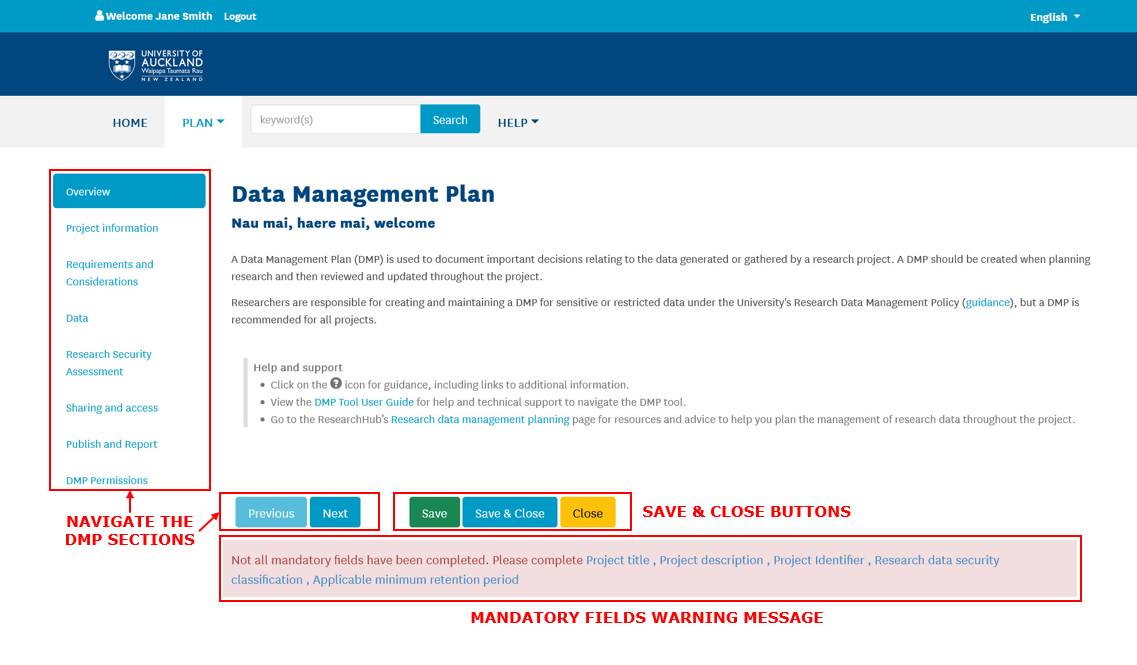
- Each heading on the left-hand menu is a section of the DMP. A description of each section can be found at the top of each page.
- You can also use the
PREVIOUSandNEXTbuttons to move through DMP sections.
Save and close the DMP
- Save your progress using the
SAVEorSAVE AND CLOSEbuttons. In general, saving as you progress is a good habit. Closing without saving will result in all new information being lost.
Mandatory fields
- There are a small number of mandatory fields indicated with an asterisk ( * ).
- If you click
SAVEorSAVE and CLOSEwithout completing these fields, you will receive a warning message about incomplete mandatory fields. You can click a field name to jump to DMP tab where the mandatory information is missing. - If you click on your browser's back option instead of using the
PREVIOUSbutton, the browser will exit you from the DMP.
Entering information
On the right of each section is where you will find the fields you need to complete.
Work through the different sections and complete as much information as possible. Depending on your research project and progress, you may not need to fill out every field.
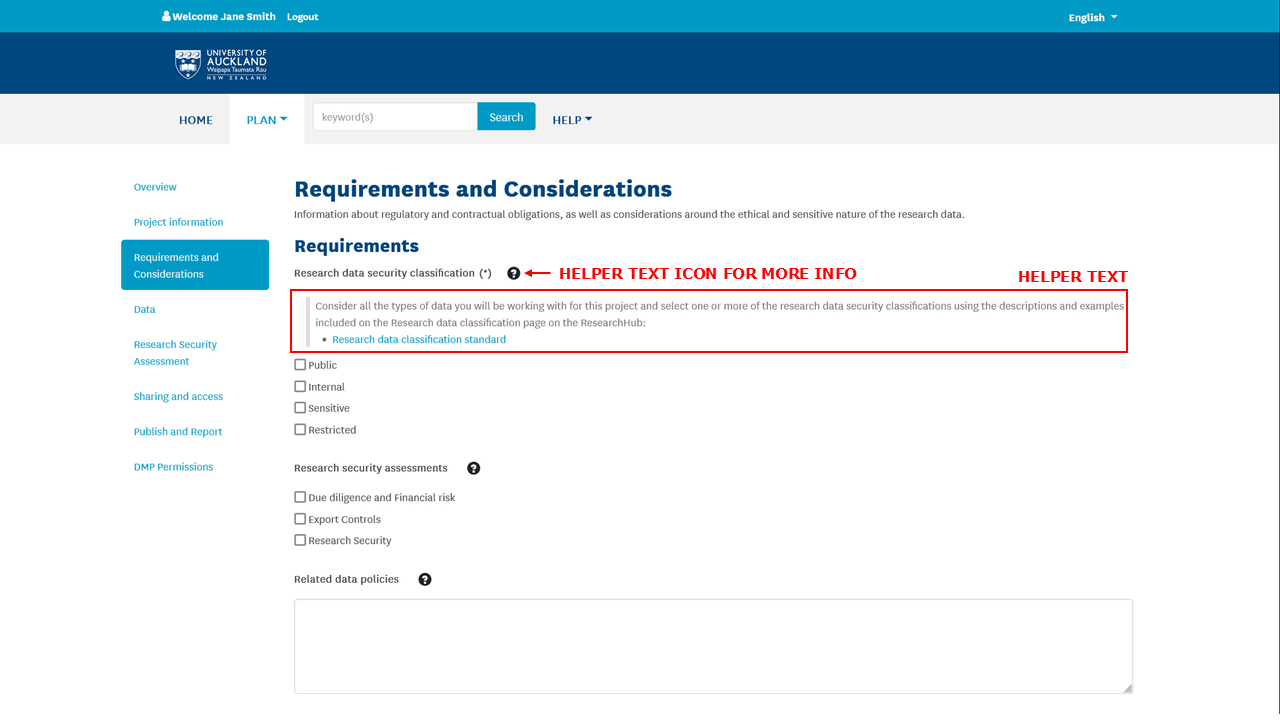
Helper text
Click on the ? icon for guidance, including links to additional information on the ResearchHub.
People fields
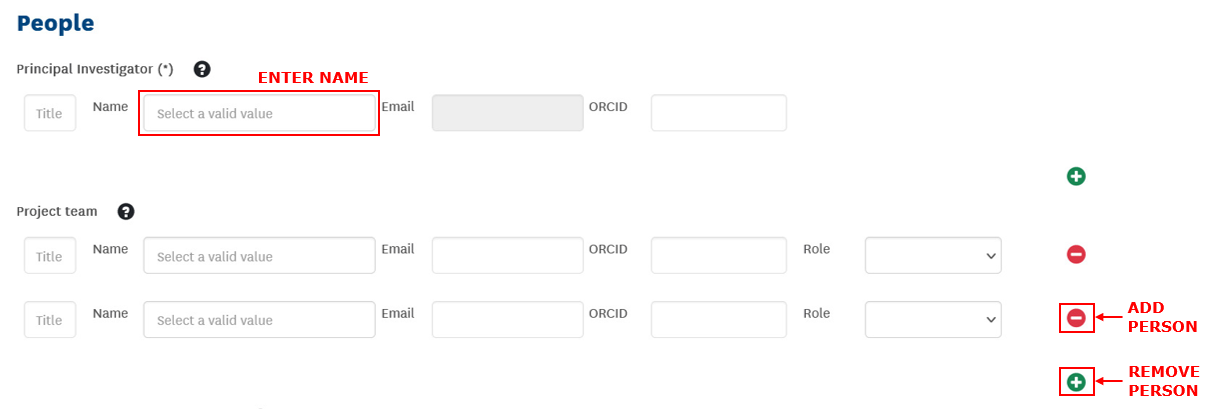
To add a Principal Investigator(s), begin typing the name in the Name field, and a dropdown list will display University of Auckland researchers. Select a name from this list, and the person details will autocomplete. Add additional PIs by clicking the + button on the right hand.
Do the same for the project team members.